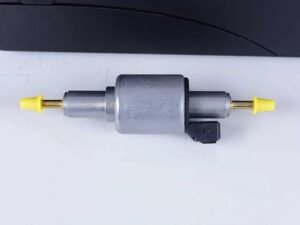
Appropriate Fuel Pump Installation Orientation
Hence, position the pump with the discharge port facing slightly upward or in an upright position. This arrangement ensures that the fuel exiting the pump maintains adequate pressure, facilitating efficient atomization.
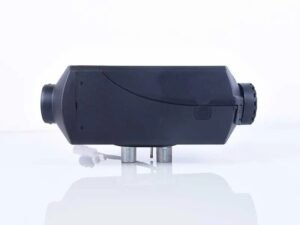
Proper Fuel Pump Installation Orientation
However, if space constraints prevent mounting the fuel pump in a tilted position, a horizontal installation is also viable.
10. Appropriate Space Between the Fuel Pump and the Main Engine
We suggest maintaining a distance of 60-100 cm (1.87 ft – 3.28 ft) between the fuel pump and the central unit.

Separation Between the Fuel Pump and the Heater Unit
When the distance is too short, the fuel pressure from the pump can be excessively high, leading to irregular combustion sounds. Moreover, an inadequate distance may cause an overflow of unburned fuel, contributing to carbon buildup and potential fuel leakage through the exhaust port.
On the other hand, having the fuel pump too far from the main heater poses issues as well. If the distance exceeds 1 meter (3.28 feet), insufficient fuel pressure may occur, resulting in uneven combustion and an undesired reduction in heating output.
11. Factors to Consider when Installing a Fuel Filter
The primary role of a fuel filter is to prevent impurities in the diesel fuel from obstructing the oil pump and disrupting the proper functioning of the diesel heater.
Placement of Fuel Filter, Fuel Pump, and Main Engine
An issue arises when certain automotive maintenance firms lack familiarity with diesel heaters, leading to employees who may not be adept at properly installing the fuel filter, resulting in operational problems.
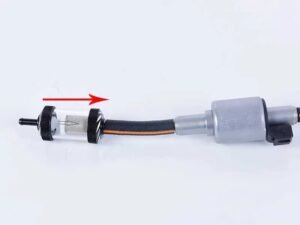
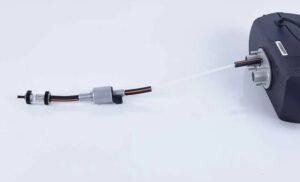
Fuel Filter Outlet and Inlet
Position the fuel filter at the inlet of the fuel pump, as this is the sole location that enables effective filtration, preventing contaminants from obstructing the pump. During the installation of the diesel filter, meticulous attention should be given to the direction of fuel flow, ensuring that the filter outlet is connected to the fuel pump’s inlet.
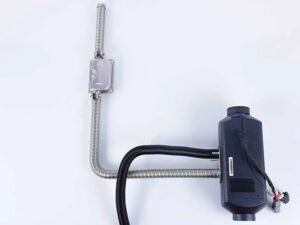
12. Selection of the Exhaust Pipe for Diesel Heaters
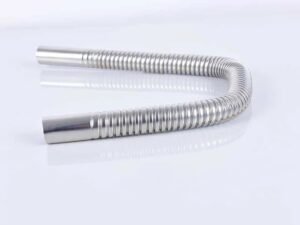
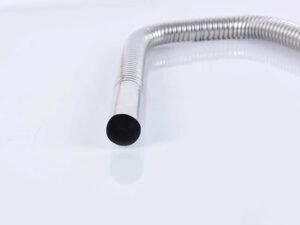
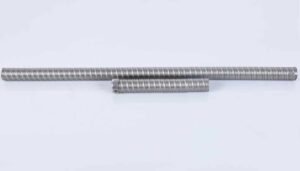
When selecting the exhaust pipe for diesel heaters, it is crucial to prioritize a specific criterion – noise. Optimal sound deadening can be achieved by utilizing a flexible spiral exhaust pipe.

Flexible Exhaust Pipe
During the operation of the diesel heater, the combustion of diesel fuel takes place in the combustion chamber. This process involves the mixing of diesel vapor and air, ignited by the electric glow plug. The combustion air is introduced into the combustion chamber in the form of a spiral airflow, ensuring thorough mixing with the diesel vapor. However, the high-speed entry of the spiral airflow into the combustion chamber can generate significant noise, which is a primary contributing factor to the noise levels observed in certain diesel heaters.
Standard Diesel Heater Exhaust Pipe
As the combustion of diesel vapor takes place within the chamber, the accompanying noise travels along with it, exiting through the combustion exhaust alongside the fumes. The noise, along with the fumes, is then expelled from the combustion chamber through the combustion exhaust vent.
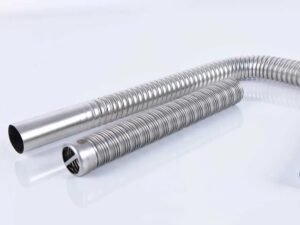
Comparison between high quality Flexible Exhaust Pipe and Conventional Exhaust Pipe
However, in the case of a heater equipped with a spiral exhaust pipe, the unique spiral structure effectively mitigates the transmission of sound waves. This design significantly reduces the noise output, making the selection of a spiral exhaust pipe a noteworthy consideration.
13. Guidelines for Selecting the Exhaust Port
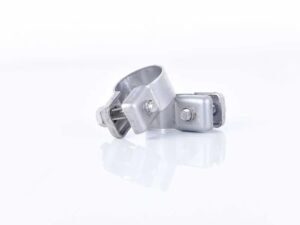
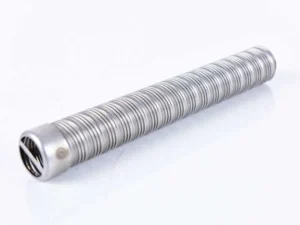
For a secure attachment of the exhaust pipe to the diesel heater’s exhaust port, it is essential to employ a spiral exhaust pipe connection. The diesel heater directly links to the combustion exhaust pipe, featuring an aluminum outlet and a stainless steel exhaust pipe. The connection is upheld by an exhaust pipe clip to firmly fasten it to the exhaust port.

Spiral Connection of Exhaust Pipe
Nevertheless, users may encounter issues where exhaust pipes occasionally detach from the top of the diesel heater while the vehicle is in operation. This occurrence is attributed to several diesel heater manufacturers utilizing unthreaded ports, lacking sufficient friction to secure the exhaust firmly in the exhaust port.
Smooth Connection of Conventional Exhaust Pipe
For this reason, it is advised that diesel heater manufacturers, retail outlets, and customers opt for an exhaust pipe featuring a spiral connection. This specific type of connection is crucial for securely maintaining the diesel heater exhaust system in place.
14. Choosing the Material and Construction of the Exhaust Pipe
The combustion system of a diesel heater operates independently. The combustion exhaust pipe is positioned beneath the vehicle, constantly exposed to corrosive substances and changing weather conditions. Therefore, the exhaust pipe must exhibit excellent corrosion resistance, and, for this purpose, most exhaust pipes are constructed using 304 stainless steel.

Construction of High-Quality Exhaust Pipe
Moreover, the limited space constraints at the bottom of the heater necessitate the exhaust pipe to possess excellent bending properties. A spiral exhaust pipe is crafted from multiple layers of stainless steel sheets, overlapped and extruded. This construction facilitates optimal flexibility and reduces installation time.
15. Alignment of Exhaust Port and Spiral Exhaust Pipe
During the installation of the diesel heater’s exhaust pipe, careful consideration should be given to the orientation of the exhaust port. Avoid horizontal installation or positioning the exhaust port facing upwards. Horizontal installation exposes the exhaust port to external winds, potentially directing airflow into the combustion chamber through the exhaust pipe. Such wind interference can disrupt the operation of the combustion chamber and may even lead to the escape of the combustion flame.
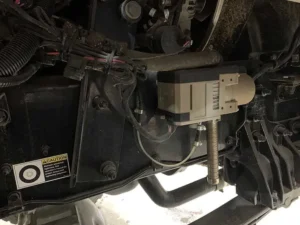
Coolant Heaters with Exhaust Port Facing Down
When diesel undergoes combustion, a minimal amount of water vapor is generated, which can condense on the walls of the exhaust pipe, forming droplets. While this is a small quantity, if the exhaust port faces upwards, the water droplets may accumulate inside the exhaust pipe. In colder temperatures, the water could freeze, leading to a reduction in the exhaust pipe diameter and impacting the combustion performance of the diesel heaters.
Therefore, it is advisable to ensure that the entire exhaust pipe maintains a slight downward tilt. This configuration facilitates the drainage of water droplets from the diesel heaters through the exhaust pipe.
16. Selecting the Clamp for the Exhaust Pipe
The exhaust pipe clamp is another component of diesel heaters that holds more significance than initially apparent. The effectiveness of the clamp plays a crucial role in securely fastening the exhaust pipe in position.
Robust Stainless Steel Exhaust Pipe Fastener
During vehicle movement, encounters with bumps are inevitable, making the clamp the sole element responsible for firmly securing the pipe in its position. Therefore, it is crucial to employ a clamp with robust clamping force. A heavy-duty exhaust clamp ensures the secure mounting of the pipe to the diesel heaters.
Applications of Exhaust Pipe Fasteners
Given that the diesel heater’s exhaust system is situated externally, subjected to various corrosive substances, it becomes essential to employ stainless steel for exhaust clamps, as well as screws and nuts, to prevent decay and rust.
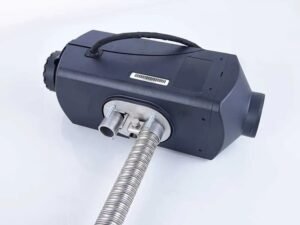
17. Optimal Placement for Muffler Selection
It’s a common error for users to install the muffler at the extremity of the exhaust pipe. However, this positioning is suboptimal, as the muffler may not effectively attenuate the noise from the exhaust pipe.

Placement of Exhaust Muffler
For optimal sound suppression, it is advisable to install the muffler in the midpoint of the exhaust pipe. Hence, we suggest that manufacturers of diesel air heaters provide two lengths of the spiral exhaust pipe – short and long.
Utilize Exhaust Pipes of Varied Lengths
Additionally, the exhaust pipe should incorporate a protective covering at its end. This safeguard helps prevent insects from entering the diesel air heater, especially during the summer months when the diesel heaters are not in operation and inhibits nesting inside the combustion chamber.
Attach a safeguard to the outlet of the exhaust pipe.
18. Guidelines for Installing the Exhaust Muffler
You may have observed that the exhaust muffler features a small opening. This aperture facilitates the drainage of condensation droplets generated during the combustion of diesel. To ensure effective drainage, it is essential to position the muffler with the hole facing downward during installation.
Orientation of the Exhaust Muffler
It’s important to be aware that certain exhaust mufflers lack a drainage hole. These mufflers are not completely sealed. To facilitate the discharge of water droplets, it is necessary to install the muffler in an upright position, allowing the water to pass through the openings in the muffler.
19. Precautions During Oil Tank Installation
Numerous manufacturers of diesel heaters opt for a fuel tank made of white plastic. However, this choice is less than ideal. Ultraviolet rays can readily permeate the white plastic, reaching the diesel fuel within the tank. Prolonged exposure of the diesel fuel to UV rays results in fuel degradation, leading to blockages in the air heater’s fuel delivery system, filter, pump, and the heater’s fuel inlet.

Black UV-Resistant Plastic Fuel Tank
In the case of utilizing a transparent white oil tank, it is crucial to install it in a location where direct sunlight won’t reach it. Additionally, contemplate incorporating a cover for the fuel tank to further mitigate UV damage.

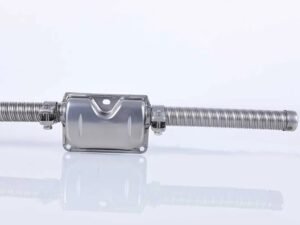
Stainless Steel Fuel Tank
If feasible, consider selecting a black plastic fuel tank, or even better, opt for a stainless-steel tank. These materials offer enhanced protection to the fuel inside the tank, preventing deterioration.

White Translucent Fuel Tank
Additionally, contemplate selecting a tank equipped with a locking mechanism. This feature serves to deter mischievous neighbors from tampering with the tank and also acts as a deterrent against theft.
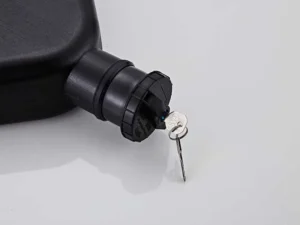
Fuel Tank Security Mechanism
Challenges Associated with Placing the Fuel Outlet at the Tank’s Bottom
Numerous manufacturers advise installing a fuel outlet at the tank’s base, creating a direct connection to the fuel delivery line—an uncomplicated and user-friendly installation approach. However, this method presents notable drawbacks:
A. Risk of Diesel Leakage Given that the fuel tank is constructed from plastic, and the outlet is typically made of aluminum or iron, mounted beneath the oil tank, accidental impacts can lead to deformation of the outlet, resulting in fuel leakage.
Resolution: To mitigate this risk, a small hole is perforated in the gas cap, allowing the standpipe to enter the fuel tank through this aperture, preventing any fuel leaks.
B. Contaminant Ingestion by the Fuel Pump Diesel fuel may contain impurities, underscoring the importance of positioning the fuel tank standpipe with a gap at the tank’s bottom. Maintaining a 2 cm (3/4 inch) space between the tank’s bottom and the standpipe enables contaminants within the diesel fuel to settle at the tank’s base. This preventive measure ensures that these impurities are not drawn into the fuel pump, averting potential clogs and sustaining proper pump functionality.
20. Factors to Consider When Installing the Fuel Tank Standpipe
The installation of the fuel tank standpipe typically takes place on the upper section of the vehicle’s fuel tank. There is a prevailing misconception among some individuals that perforating holes in the vehicle’s fuel tank can cause damage. However, it’s important to clarify that drilling holes does not impact the integrity of the tank in any way.
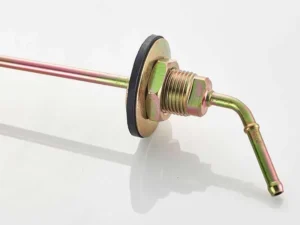
Standpipe for the Fuel Tank
Ensure that during the installation of the fuel tank standpipe, a gap of over 2 cm (3/4 inch) is maintained between the standpipe and the bottom of the fuel tank. This precautionary measure prevents the suction of settled substances from the tank’s bottom, averting potential clogs in the fuel pump.
21. Considerations for Intake Filter Installation
The intake filter functions to purify the air entering the combustion chamber of the diesel heater, effectively eliminating dust and other impurities. Additionally, it serves as a preventive measure against carbon accumulation within the heater.